These sweet and fluffy Conchas are one of the most popular types of pan dulce in Mexican bakeries! Here’s how to make this sweet bread at home.
WHAT THE HECK ARE CONCHAS?
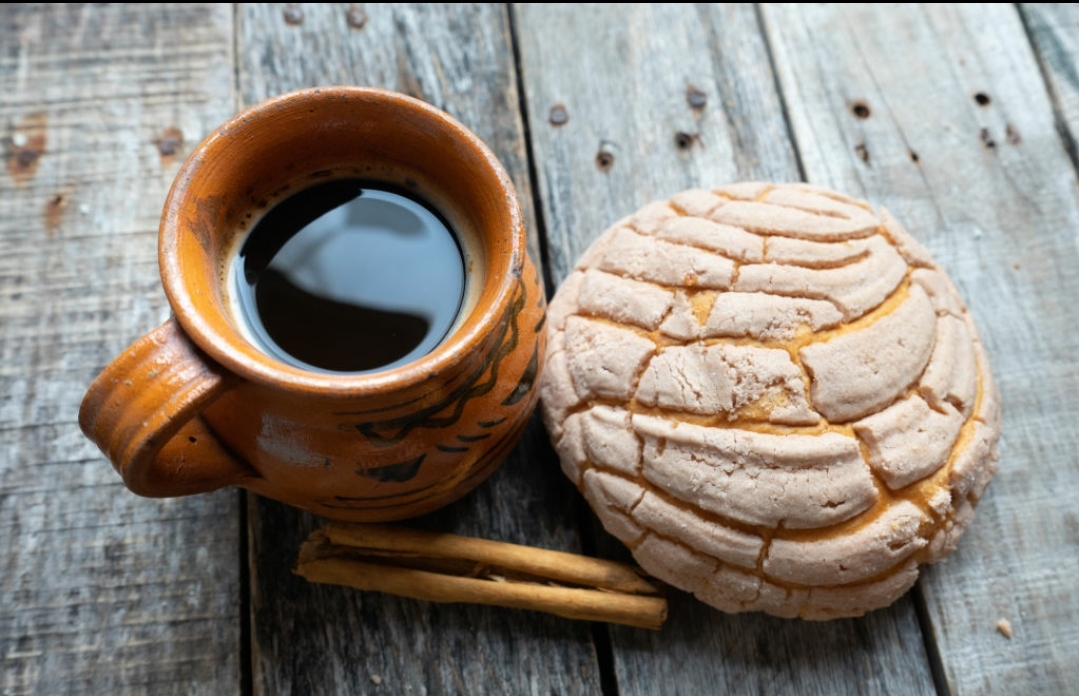
Conchas are a popular type of pan dulce (or Mexican sweet bread) that’s commonly sold in panaderias (or bakeries) across the U.S. and Mexico. The word ‘concha’ translates to ‘shell’ in English, which describes their fun seashell-like appearance. The bread is lightly sweet, fluffy and airy and the topping is perfectly crunchy and oh-so satisfying.
While this recipe is easy to make, it does require some patience because you have to let the dough rise.
TIPS FOR MAKING THE BEST CONCHAS
- Make sure your yeast is alive before adding it to the dough. To do this, mix together the yeast, warm milk and a little sugar in a small bowl. Then loosely cover it with plastic wrap and let it sit for 5 minutes. If the mixture is bubbly and/or frothy, that means the yeast is alive and thriving which is great! If it’s not, that means the yeast is likely dead and you need to start over with a new yeast packet.
- Be patient and give the dough time to rise. If you want light and airy conchas, you can’t rush the rising process. Make sure the dough about doubles in size during the first rise, and then again once you’ve shaped the dough. I made this and let the dough rise about 2 hours each time in a warm place. For me, that was on top of my fridge and the microwave, but if you make these during the winter and/or your house is on the cool side, it may take a little longer.
- If possible, use a tortilla press to flatten the topping. Just like when making corn tortillas, I find that using a tortilla press makes flattening out the topping so much easier and neater. Here’s the tortilla press (affiliate link) that I have and that I highly recommend. If you don’t have one, no worries. You can still use a rolling pin.
This recipe makes a total of 12 conchas – 6 with a vanilla topping and 6 with a chocolate topping.
INGREDIENTS:
FOR THE BREAD
- 1/2 cup whole milk
- 1 packet active dry yeast
- 1/3 cup granulated sugar, divided
- 3 1/2 -3 3/4 cups all-purpose flour
- 3/4 teaspoon salt
- 1/2 cup (1 stick) unsalted butter, melted
- 3 large eggs, beaten
- 1 teaspoon olive oil, for greasing
- 2 tablespoons granulated sugar, for sprinkling on top
FOR THE TOPPING
- 1 cup all-purpose flour
- 2/3 cup powdered sugar
- 1/2 cup (1 stick) unsalted butter, room temperature
- 1/2 teaspoon baking powder
- 1 teaspoon clear vanilla extract (or pure vanilla extract if you don’t mind an off-white topping)
- 1 tablespoon unsweetened cocoa powder
INSTRUCTIONS
FOR THE BREAD
- Heat milk in small bowl or cup for 10-20 seconds until it reaches 105°F-110°F. Mix in yeast, 1 tablespoon sugar and loosely cover bowl with plastic wrap. Let it sit for 5 minutes. If the mixture is bubbly or frothy, that means the yeast is alive and thriving. Continue to the next step. If the mixture hasn’t really changed at all, throw the mixture out and start again with a new packet of yeast. (I recommend using a thermometer to make sure your milk isn’t too hot, otherwise it could kill the yeast.)
- In the bowl of a stand mixer (or a regular large bowl), add flour, the remaining sugar and salt. Mix together with a spoon to combine.
- Add melted butter, eggs and mix together again to lightly combine. Next, add in the milk/yeast mixture and knead in the stand mixture using the dough hook for 6-8 minutes (or by hand), until the dough is smooth and elastic. The dough should be slightly tacky, but not completely sticky. If it is sticky, add in more flour 1 tablespoon at a time until the dough is no longer completely sticky.
- Place the dough in a large greased bowl, cover loosely with a sheet of plastic wrap and let it rise in a warm place for 2 hours, or until the dough has about doubled in size. (I like to let mine rise on top of the fridge.)
- While dough is rising, line 3 large baking sheets with parchment paper.
- Divide the dough into 12 equal pieces and shape into balls. Place 4 balls on each of the prepared baking sheets and cover loosely with a clean kitchen towels. Let the balls rise again for 2 hours in a warm place.
- While the dough rises, prepare the topping.
- Preheat oven to 350°F. Carefully place the prepared topping on top of each dough balls and lightly sprinkle with sugar.
- Bake for 20-25 minutes, until dough is lightly golden brown. Remove from oven and enjoy!
FOR THE TOPPING
- Add flour, powdered sugar, butter and baking powder in a large mixing bowl. Beat the mixture with a handheld mixture or in a stand mixture until light and fluffy.
- Divide the mixture in two and place one half in a separate small bowl.
- Make the vanilla flavored topping by adding clear vanilla extract to half of the dough. Beat the mixture until fully combined. Gather the dough with your hands, divide it into 6 equal pieces and shape into balls.
- Make the chocolate flavored topping by placing the other half of the mixture into the large mixing bowl. Add cocoa powder and beat until fully combined. Gather the dough with your hands, divide it into 6 equal pieces and shape into balls.
- Lightly flatten each ball in between two sheets of plastic wrap using a tortilla press or a rolling pin. Make sure not to press it down too much as it will become too thin. Try to make it as big as you expect the risen concha dough balls to be.
- Using a small pairing knife, cut grooves into the dough so it resembles a shell. You could also purchase a concha shell cutter to stamp the dough and make the process easier. Carefully remove topping from plastic wrap and transfer to the risen bread balls.